Connect to Intune
To upload packages to Microsoft Intune using Master Packager Toolbox, you must first connect to your Intune tenant. There are two connection options:
- Option 1: Sign in with Microsoft Account — sign in and approve the required permissions. Recommended for most users.
- Option 2: Custom Application Registration — register your own Microsoft Entra application for full control over permissions. Recommended for advanced users.
Option 1: Sign in with Microsoft Account
Sign in using an account that has one of the following roles in your Microsoft Entra tenant:
- Global Administrator
- Cloud Application Administrator
- Application Administrator
This is required to register a Microsoft Entra application that allows Master Packager Toolbox to communicate with the Microsoft Graph API.
This registration only needs to be done once. After the application is registered, any user in your tenant can sign in — not just administrators.
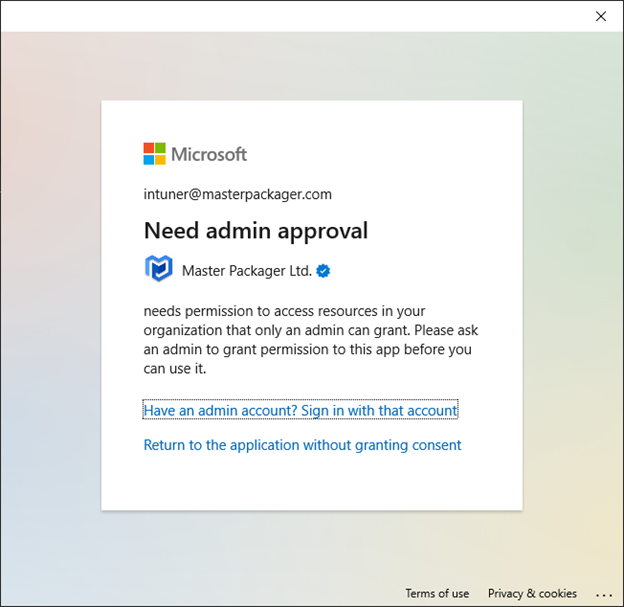
If you do not have the required permissions, you will receive the following message:
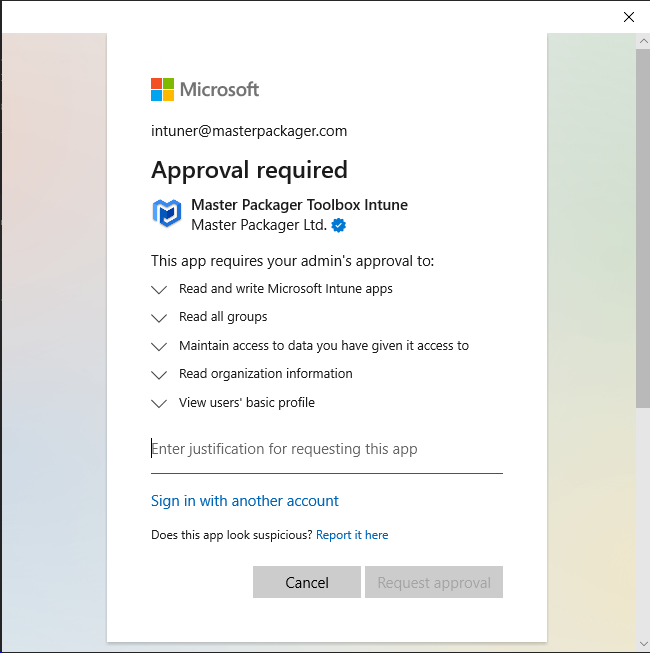
If your organization has allowed users to request admin approval, you will see the following message instead:
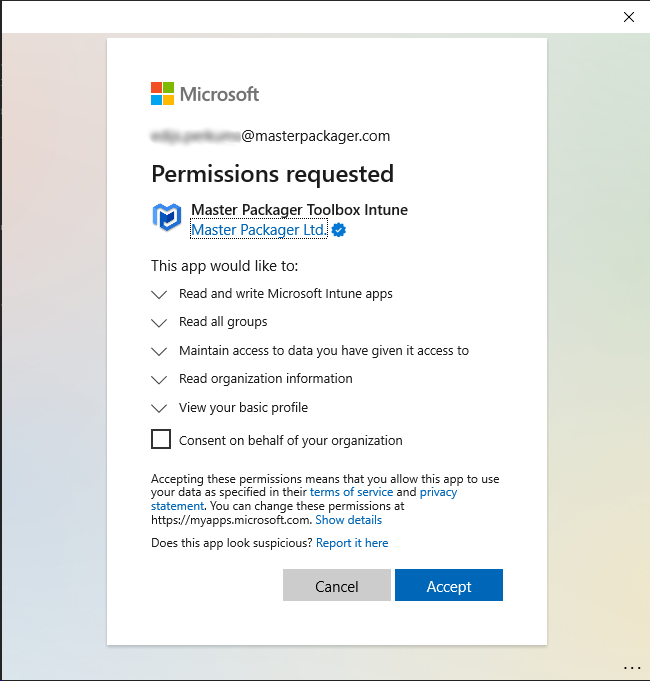
If you have the required permissions, tick the consent checkbox and click Accept.
Option 2: Custom Application Registration
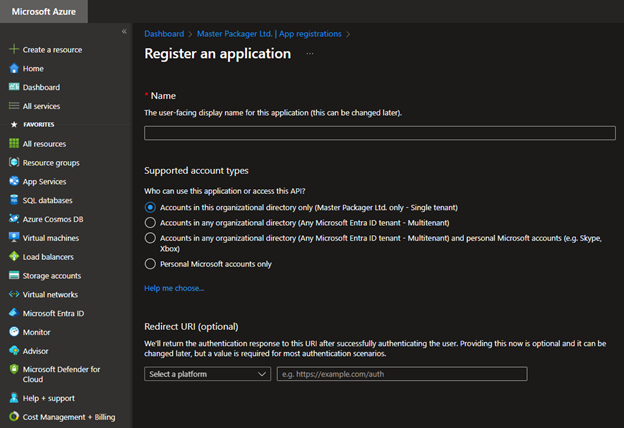
If you need more control over the permissions granted to the application, you can register your own Microsoft Entra application. Follow the Microsoft guide: Register an application.
Step 1: Configure API Permissions
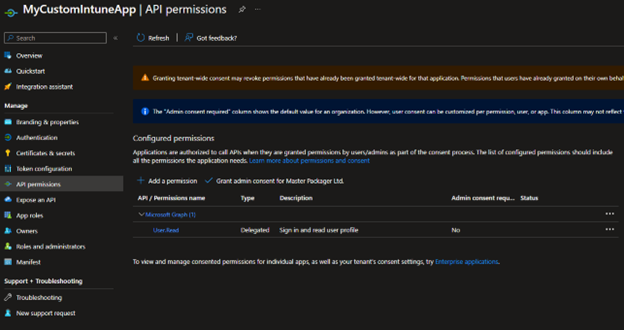
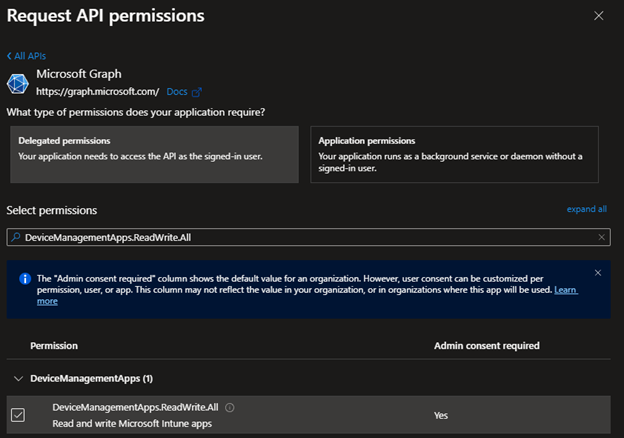
Once you have registered your application, open the API permissions section and add the permissions listed below.
Required Permissions
These permissions are mandatory for Master Packager Toolbox to function:
| Permission | Description |
|---|---|
DeviceManagementApps.ReadWrite.All | Read and write Microsoft Intune apps. Without this permission, you cannot upload apps. |
offline_access | Maintain access to data without requiring repeated sign-ins. |
openid | Allow users to sign in with their work or school accounts. |
profile | Access basic user profile information (name, picture, email address). |
Optional Permissions
These permissions enhance functionality but are not required:
| Permission | Description |
|---|---|
Group.Read.All | Read all groups. Required to assign Intune applications to groups. |
Organization.Read.All | Read organization information. Required to display tenant name and logo. |
Step 2: Configure Authentication
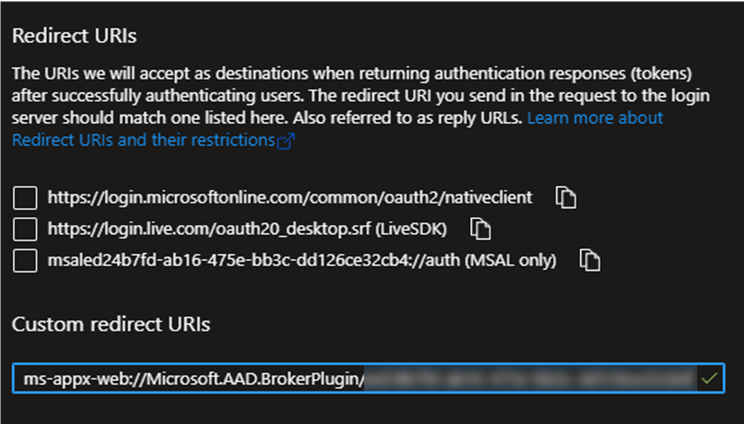
After adding the permissions, navigate to the Authentication section and add a redirect URI.

- Click Add a platform and select Mobile and desktop applications.
- Add a custom redirect URI:
ms-appx-web://Microsoft.AAD.BrokerPlugin/<Your-Application-ID>
Replace <Your-Application-ID> with the Application (client) ID from the application's overview page.
Step 3: Apply Application ID in Master Packager Toolbox
- Open Master Packager Toolbox.
- Navigate to the Upload to Intune section.
- Click the Edit button and enter your Application ID.
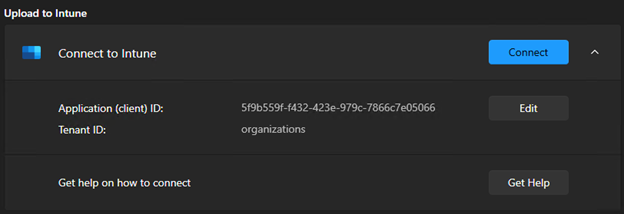
- Click Connect and sign in with your credentials.
You are now ready to upload packages to Intune.