Run PowerShell Script
Use this predefined action to run custom PowerShell during installation or uninstallation when standard MSI tables are not enough.
The working directory is typically C:\Windows\System32, so use absolute paths when the script depends on specific files or folders.
note
Return the correct exit code from the script. 0 indicates success. Any other exit code causes the MSI installation to fail. You can also write to standard output to include messages in the installation log.
When to Use It
Use this action for tasks such as:
- File management — Create or delete files.
- Permissions — Adjust file or folder permissions.
- Registry changes — Add, update, or remove registry keys.
- Environment configuration — Set environment variables.
- Custom logic — Handle installation tasks that standard
MSItables cannot express directly.
Fields
| Field | Description |
|---|---|
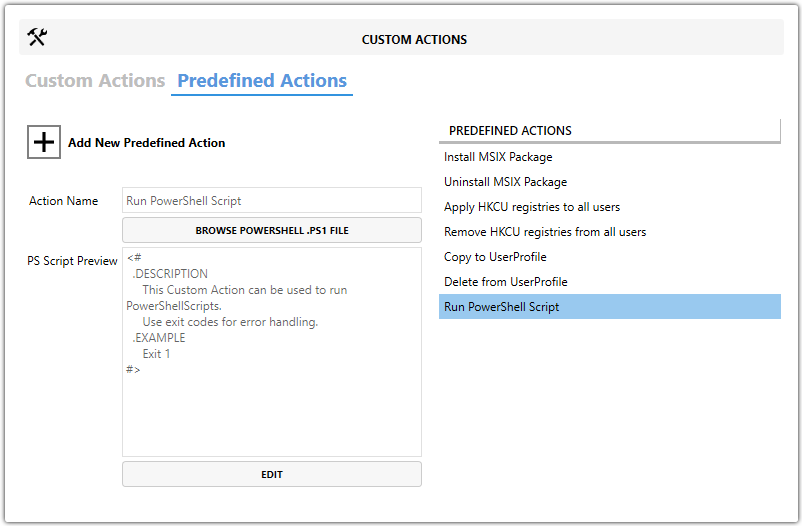
| Action Name | Identifies the predefined action in your project. |
| PowerShell code | Lets you browse to an existing .ps1 file or open the editor to write or paste the script directly. |
| PS Script Preview | Shows the script content so you can review it before saving the action. |
Script Header Example
Use the following header format:
<#
.DESCRIPTION
This Custom Action can be used to run PowerShell scripts.
Use exit codes for error handling.

.EXAMPLE
Exit 1
#>
Steps
- Open the
MSIorMSTin Master Packager. - In the left pane, select Custom Actions.
- Open the Predefined Actions tab.
- Click Add New Predefined Action and select Run PowerShell Script.
- Enter a value in Action Name.
- Add the script by browsing to a
.ps1file or by editing the code inline. - Review the content in PS Script Preview.
tip
Test the script outside the MSI first, especially if it will run under SYSTEM context.