How to Use Master Repackager
This guide walks through the full repackaging workflow, from capturing system changes to building a deployment-ready MSI or MSIX package.
To get the best results, always use a clean virtual machine. This prevents unrelated system activity from being included in the final package.
Capture snapshots
The snapshot process compares the system state before and after your changes.
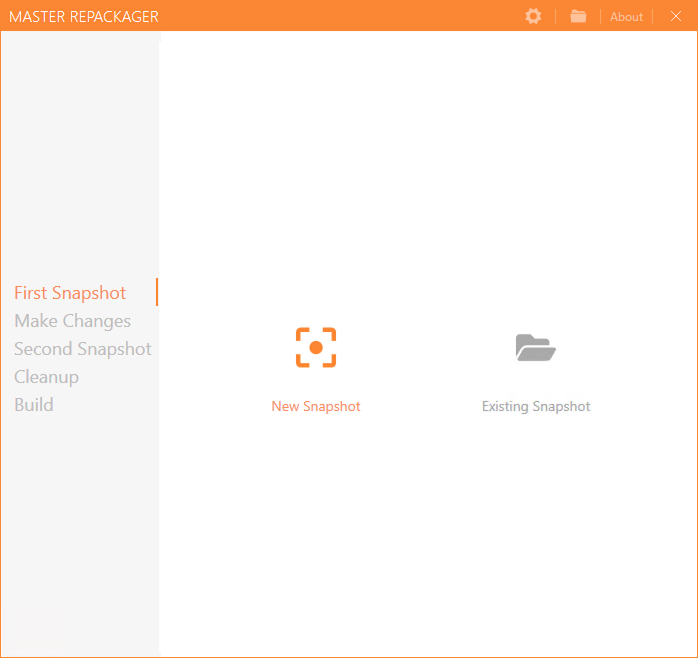
Create the first snapshot
- Open Master Repackager.
- Select New Snapshot.
- Wait while the current system state is captured.
- Confirm that the snapshot completed successfully.
This first snapshot becomes the baseline for the comparison.
Make system changes
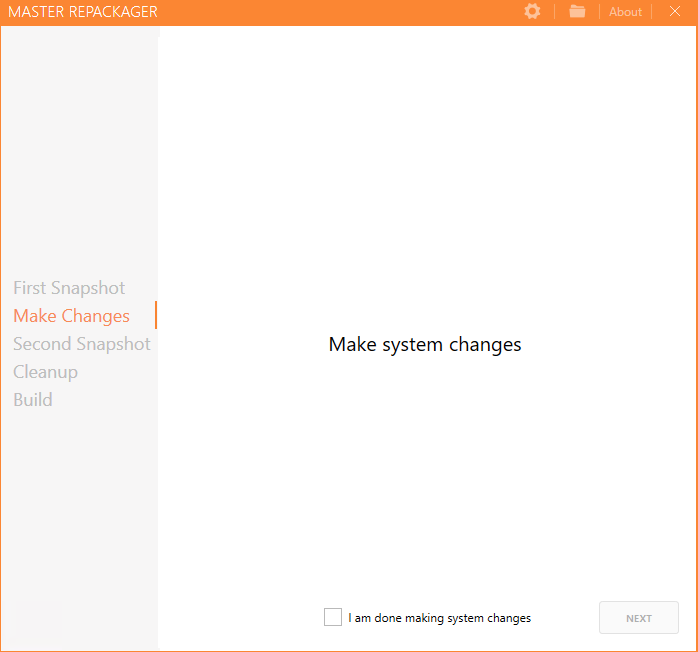
After the first snapshot is complete, perform every action that should be included in the final package, such as:
- Installing the application.
- Adding files or folders.
- Modifying system or user registry settings.
- Configuring drivers, services, or policies.
When you are finished:
- Return to Master Repackager.
- Select I am done making system changes.
- Click Next.
Create the second snapshot
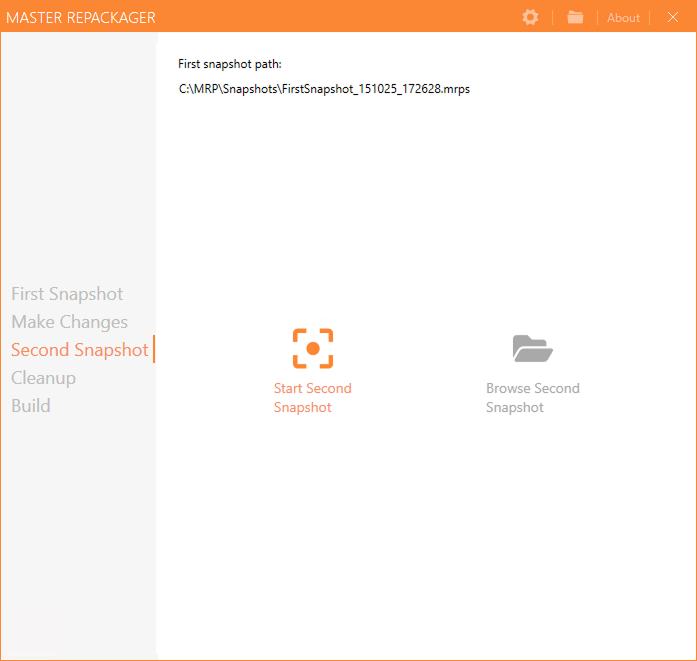
- Click Start Second Snapshot.
- Wait while Master Repackager scans the system again.
- Review the detected new, changed, and removed files and registry entries.
The captured differences form the basis of the final MSI or MSIX package.
Review captured changes
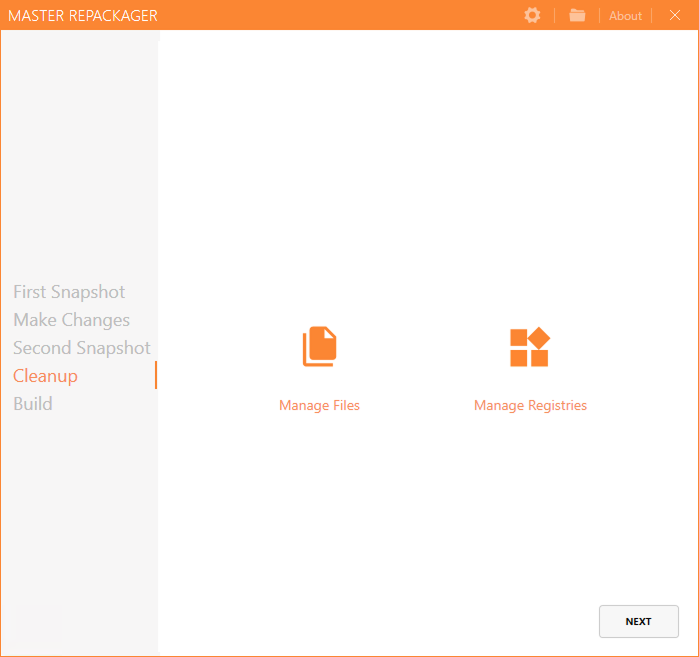
After both snapshots are complete, review the captured data and remove anything that should not be included in the final package.
Review files
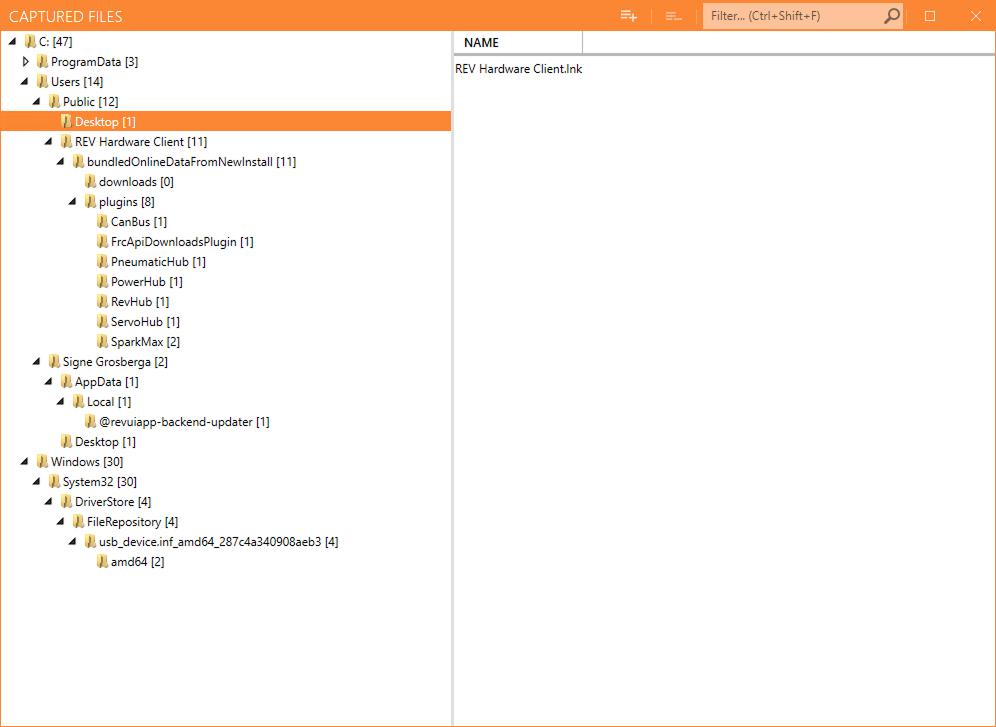
In the Files section, you can:
- Inspect captured files — Review all new, modified, or removed files and folders.
- Include or exclude items — Clear files that are unrelated to the application, such as temporary files, log files, or system-generated data.
- Reorganize the file structure — Adjust how files are grouped or placed in the final
MSIdirectory structure. - Check file paths — Confirm that all captured files will be installed in the correct locations.
Review registries
In the Registries section, you can:
- Review captured keys and values — Inspect all newly created or modified registry entries.
- Exclude irrelevant entries — Remove unnecessary keys such as installer caches, recently used file lists, or operating system telemetry data.
- Import additional keys — Add registry keys that were not captured but are required for the final package.
- Open items in Registry Editor — Verify captured keys directly in the system registry.
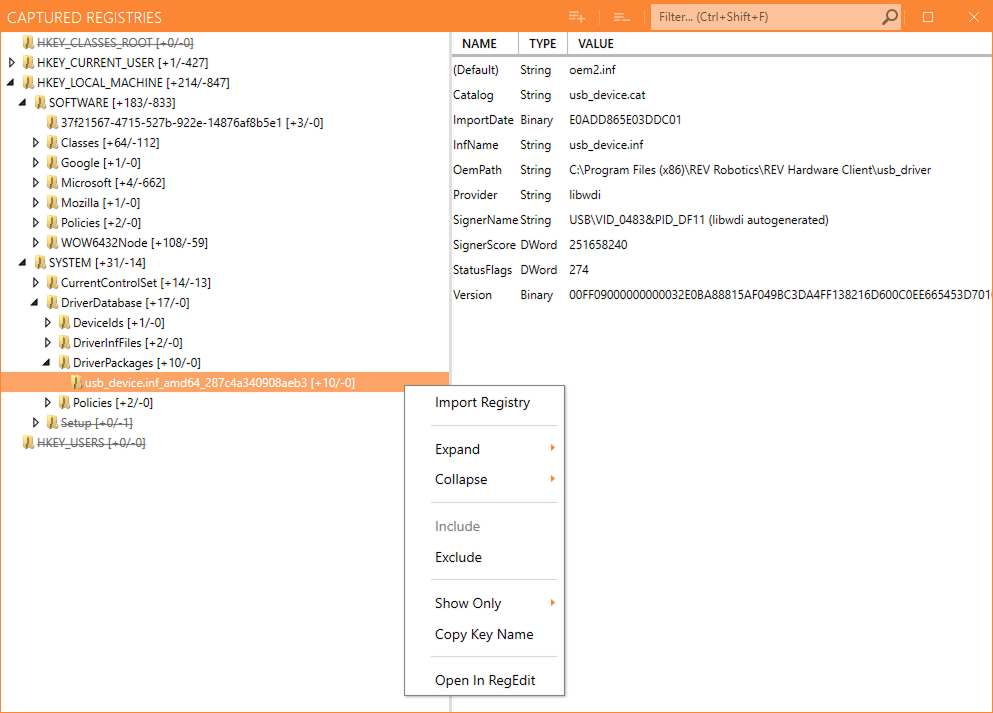
Proper registry cleanup helps ensure that the final installer contains only essential application configuration data.
Build the package
Once you finish reviewing the changes, use the Build section to create the final package.
- Open the Build section.
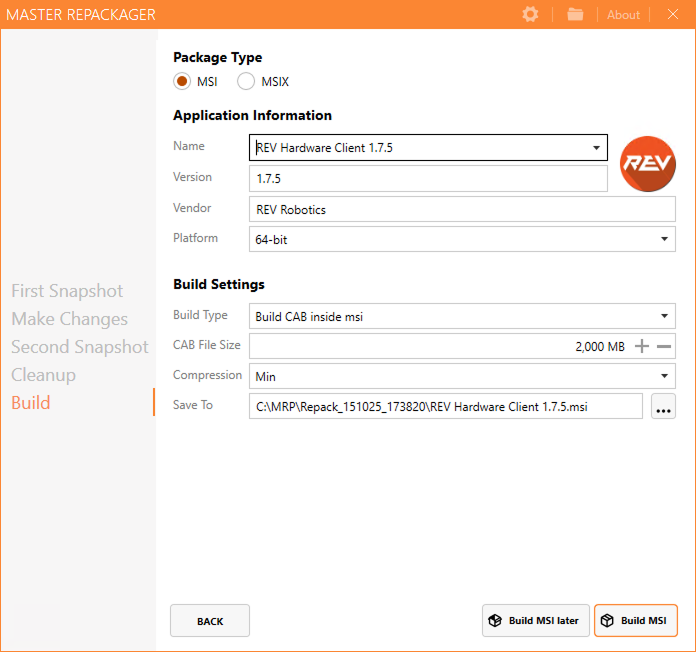
- Complete the application details.
| Field | Description |
|---|---|
| Package Type | Choose MSI or MSIX. |
| Name | Specify the application name. |
| Version | Set the package version. |
| Vendor | Specify the software vendor. |
| Platform | Choose the target platform (32-bit or 64-bit). |
- Configure the build options.
| Field | Description |
|---|---|
| Build Type | Select how the CAB files will be included. |
| CAB File Size | Set the size limit for CAB archives. |
| Compression | Choose the compression level. |
| Save To | Specify where the built package will be saved. |
- Click Build MSI to generate the installer, or click Build MSI later to save the project and build it another time.
Validate MSIX compatibility
When you build an MSIX package, Master Repackager can analyze the captured files and registry changes to identify items that are unsupported or need attention.
When to use it
Use this validation when you want to convert an application to MSIX and need to confirm whether it can work within MSIX constraints before full testing.
For more information about MSIX limitations, see How to spot MSIX limitations like Master Packager.
Run validation
- In Build, select
MSIXas the package type. - Click Validate MSIX compatibility.
- Review the validation results to determine whether the application is compatible.
Validation output
| Column | Description |
|---|---|
| Type | Severity level: Incompatible, Warning, or Information. |
| Description | Description of the issue found in the package. |
| Path | Path to the source of the issue. |
| URL | Link to more information about the issue and possible solutions. |
Additional details:
- More than
17validation rules are applied. - Rules are updated from a remote server without requiring a new Master Packager version, which helps keep validation results current with ongoing
MSIXdevelopment.